
Introduction
Part of owning a car is dealing with many mix-ups ranging from minor to major electrical and mechanical issues. You will most likely experience more minor breakdowns due to faulty electrical components.
Among the components that fail from time to time is the starter motor which cranks the engine during ignition. But signs like grinding or whirring sound or having dashboard lights but no engine power indicates a problem with your starter motor.
Thankfully, testing a starter motor is not that demanding and solving such issues can be a DIY work. Continue reading below to know the proper procedure of starter motor testing.
How Does a Starter Motor Works?
Before jumping in on how to test a car starter, let’s understand first how it works.
A starter motor is a small electrical device responsible for cranking the car engine. This small but powerful part transforms the electrical charge from the battery into mechanical energy by moving the crankshaft through the flywheel attached to the rear.
Basically, what a starter does is to start the combustion process in the engine by moving the pistons. When you start a car, the starter motor’s pinion gear engages and rotates the flywheel thereby turning the engine over.
Starter motors are found in modern cars which replaces the old, manual way of starting car engines through a crank handle. This makes starting the engine safer and more efficient.
methods to Test the Starter Motor
While a starter motor remains a small component, starter testing can be done in several ways and not just one. After all, it does not operate on its own, it still needs a battery and other components to function properly. This means the issue can be on the starter motor or other parts.
Here are different ways to check starter system of your car.
1. Check for signs of jammed pinion
The pinion gear of a starter is responsible for moving the crankshaft by engaging and rotating the flywheel and disengaging once the engine turns over. As a moving part, the pinion gear can potentially jam and fail to function.
Here’s what you have to do to see if it’s the pinion gear that’s giving the problem.
- Check if the switched headlights dim when you start the engine.
To test starter without removing it, you’ll need to visually inspect the signs of a jammed pinion. When the switched on headlights dim when you are trying to start it’s a sign your pinion gear is jammed to the flywheel.
You’ll also hear the sound of an engine trying to start along with the dimmed lights when the pinion is at fault. However, if there is a clicking sound without the noise of an engine trying to start and the light also dims, the problem should be the battery. This time you must directly check the electrical components.
- Free the jammed pinion.
Once sure of a jammed pinion, avoid using the starter first before freeing it up. Look for the square tab at the back of the starter cylinder and turn it to release the jam.
In case there’s no such tub and you have a manual transmission, turn off the ignition, lock into the second gear, release the handbrake then wobble the car back and forth until the pinion is unjammed.
If you have an automatic transmission, it’s best to remove your starter and bench test it.
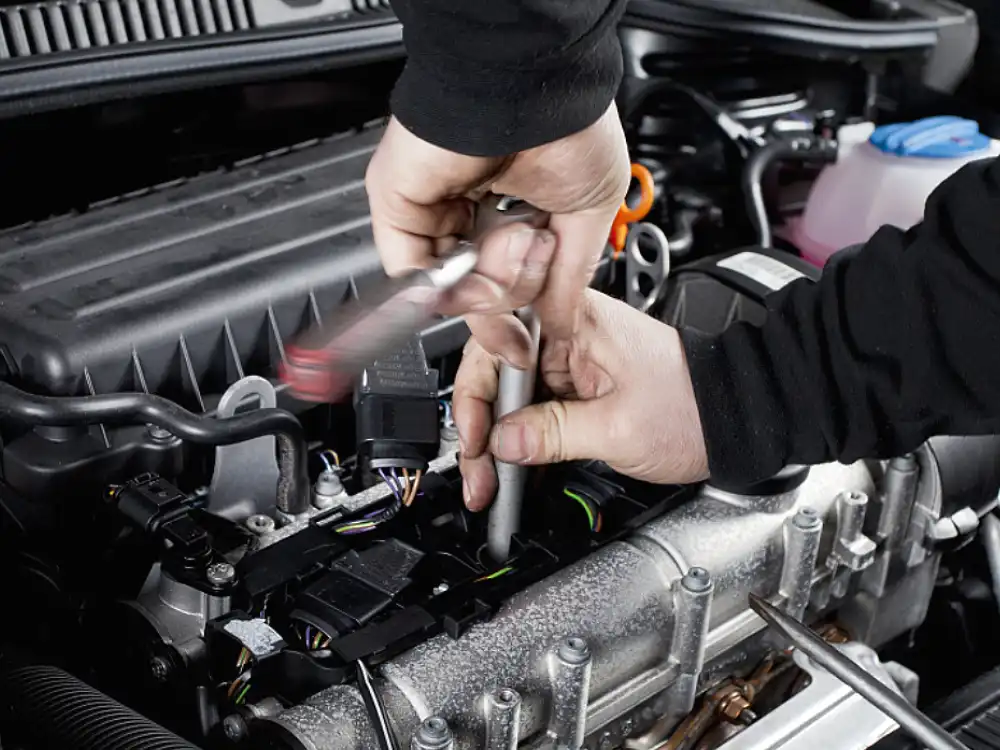
2. Check for Electrical System Problem
In an automobile there is what’s called “the electric trifecta” which consists of the battery, alternator, and the starter motor. Each one compliments the other in a mechanical and electrical cycle. The battery powers the starter motor which turns the engine over thereby spinning the alternator to recharge the battery.
When one of these components fails, it will likely affect the other components as well. Follow the steps below to test starter motor for electrical issues.
- Inspect battery for loose connections and voltage.
With a simple visual inspection you can easily identify if some electrical connections are at fault. Try inspecting under your hood for any loose wirings or corrosion which may restrict electric output. Clean the battery terminals and rehook disconnections.
For more accurate inspection, follow through with a multimeter test of the battery’s voltage. Ensure that your voltage is right and change your battery if it shows signs of problem.
- Examine the solenoid.
When there’s no problem with the battery at all but your car won’t start, it’s likely that you have a faulty solenoid. A starter solenoid is an electromagnet attached to the motor which is prone to suffering from faulty connections as well.
Once you’ve resolved any disconnections to the solenoid but the problem remains, you must do a circuit test on this device. A test lamp will not light up if there remains a connection problem but if it does a problem with the solenoid or the starter itself lingers.
Depending on the result of your diagnosis, it’s either you proceed with self repair or bring the component for professional work or parts change.
3. Bench Test your Starter
So, what is a bench test? First off, bench testing should depend on your level of confidence in your skills. If you’re not that confident, you can leave the bench test to the pros.
Bench testing is a system of validation if there’s any problem with the starter, which involves removing or unbolting the motor from under the hood. Here are the proper ways on how to bench test a starter.
- Remove the starter.
How do you test a starter through bench test? Start with the disassembly.
Disconnect all the wires from the starter then unbolt the motor from the block. Make sure you mark all the wirings to properly reconnect them during the reassembly. Referring to the owner’s manual will also be a great help to avoid getting lost along the process.
- Connect jumper cables.
The next thing you need to do is to clip some jumper cables into your starter motor. Find a red jumper cable, attach one end to the battery’s positive terminal and the other end to the solenoid. Next, connect a black jumper cable to the battery’s negative terminal while the other end clips onto the starter’s ear off the main cylinder.
- Connect one more cable to the starter terminal and do the test.
You’ll need another set of cable, preferably with alligator clips at both ends for better connection. Clip the other end of the cable to the small terminal off the solenoid.
Before attaching the other end make sure your starter is firmly in place. Either you look for an assistant or put on your booted foot on the motor to prevent it from moving or jumping around in case there’s a problem with it.
Once secured, connect the remaining end of the third wire to the same terminal that the positive cable’s other end is attached to. At this point, your starter should spin. If it does not, your motor has a problem and needs replacement. Find out how much it will cost to replace a starter motor.
Common Causes of Failure
Now that you have a good grasp on how to test if starter is bad, you might want to characterize the common causes of failure as well.
Just like a car battery, which normally gets replaced between three to five years, a starter also has an expected service life from 100,000 to 150,000 miles. However, these components don’t fail through wear and tear alone.
Here are other reasons why a starter motor abruptly fails.
- Exposure to elements
Every auto part is expected to function properly under ideal conditions. The exposure to elements such as water and soil could lead to corrosion and early deterioration of metal parts.
Water can short circuit electrical components and wash off protective lubrication while dirt can lead to corrosion and rust.
- Extreme driving conditions
Automotive components are expected to perform under certain conditions and pressure. However, constant exposure to extreme heat or extreme cold can wear out components in starters and batteries a lot faster.
It is important to follow regular and safe driving conditions so as not to over expose the vulnerabilities of your components.
- Improper and poor installation
Regular maintenance measures are required to prolong the lifespan of a component or the vehicle as a whole. This involves proper installation of critical components such as electrical devices. Any misalignment on simple connections can cause a part to break down more easily or fail a system all at once at any moment.
Conclusion
A starter motor is a simple and small part of your vehicle but holds a critical role in whether your car would drive or not. Knowing how to test a starter will prove critical knowledge and skill once you encounter problems with your ignition.
It is imperative that you learn how to check car starter to diagnose any related problem that may arise. But most importantly, make sure that you maintain your vehicle’s condition to avoid such problems in the first place.
While starter testing may be an easy DIY job, it still pays nothing to be more extra careful.